
In this GNS3 basic lab, you will learn how to add a subnet for servers and add the first Debian server, which will be used as a DNS server for the whole network, to this subnet.
- CORW-SW and DC-SW Config
- EIGRP update
- SRV-DNS Debian server config
1. Configuration of CORE-SW and DC-SW
On CORE-SW, we will add VLAN DC with a 10.20.1.0/24 subnet. Then, we will configure the trunk port. Next, we will add VLAN DC to DC-SW, configure the trunk port and access port, and configure the loopback interface of DC-SW.
# On CORE-SW
# CORE-SW VLAN DC
en
conf t
vlan 30
name DC
int vlan 30
ip address 10.20.1.1 255.255.255.0
no shut
# Rename users VLAN’s
vlan 10
name users10
vlan 20
name users20
end
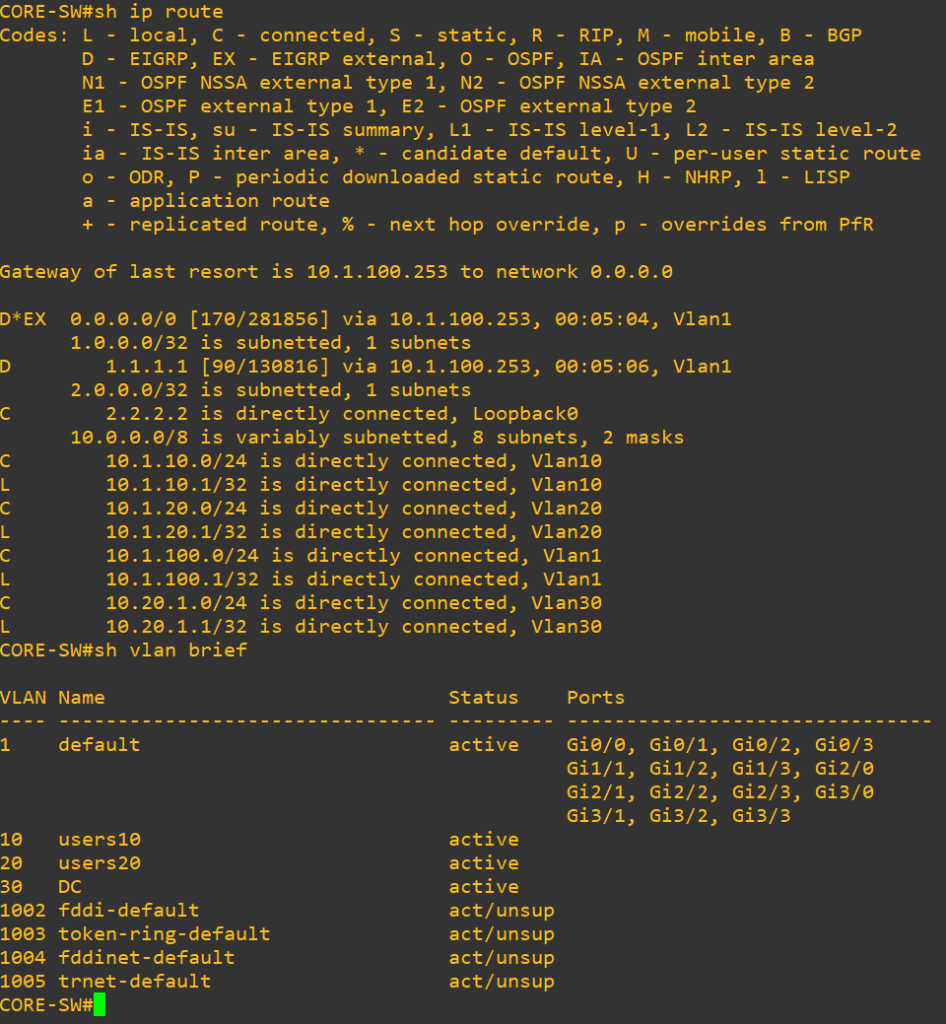
# Confirmation of config
sh ip route
sh vlan brief
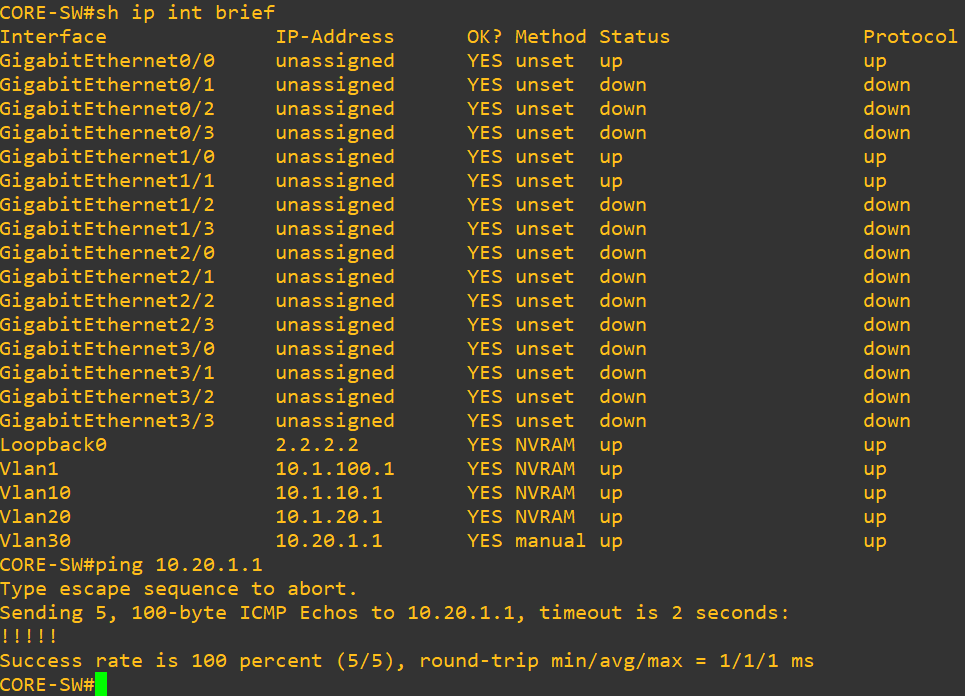
sh ip int brief
ping 10.20.1.1
# Trunk port to DC-SW on G1/1 interface
conf t
int G1/1
switchport trunk encapsulation dot1q
switchport mode trunk
switchport nonegotiate
no shut
end

wr!
# On DC-SW
# Giving a hostname to DC-SW switch
en
conf t
host DC-SW
# DC-SW VLAN configuration
vlan 30
name DC
int vlan 30
ip address 10.20.1.2 255.255.255.0
no shut
vlan 1
ip address 10.1.100.3 255.255.255.0
no shut
# Trunk port to CORE-SW on G0/0 interface
int G0/0
switchport trunk encapsulation dot1q
switchport mode trunk
switchport nonegotiate
no shut
# Access port to srv-dns debian server on G1/0 interface
int G1/0
switchport mode access
switchport nonegotiate
switchport access vlan 30
no shut
# Configure loopback interface on DC-SW
int loopback 0
ip address 4.4.4.4 255.255.255.255
no shut
2. EIGRP – adding new VLAN and DC-SW switch to existing EIGRP
To expand our network, we will be adding a new VLAN for DC subnet and a DC-SW switch to our existing EIGRP configuration.
# On DC-SW
# Create EIGRP on DC-SW
en
conf t
router eigrp 100
network 10.0.0.0
network 4.4.4.4 0.0.0.0
no auto-summary
end
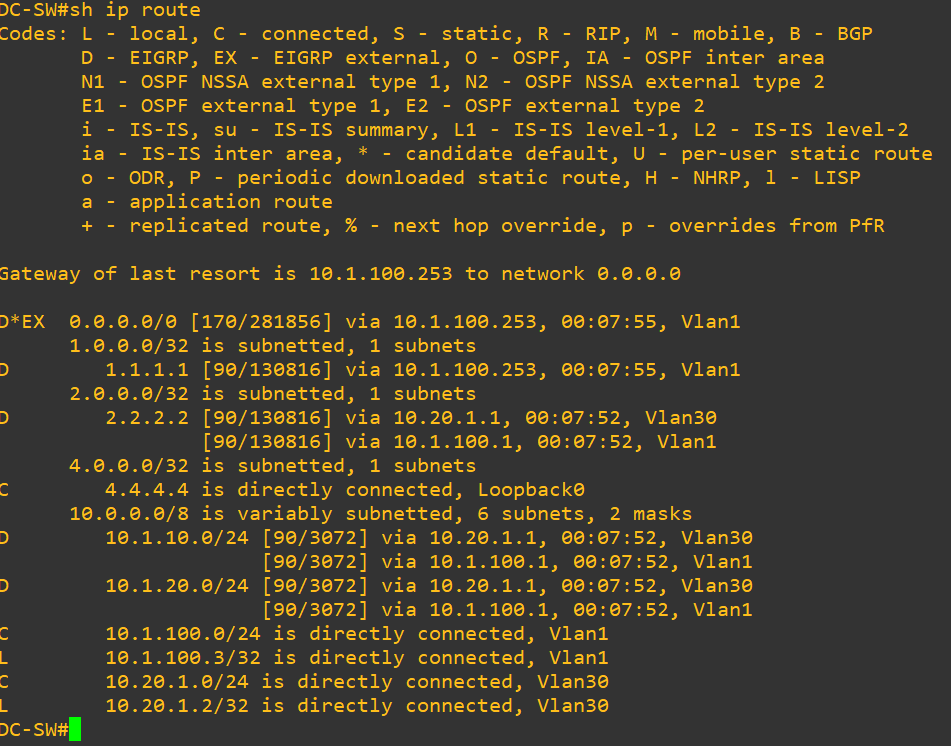
# Confirming changes
sh ip route
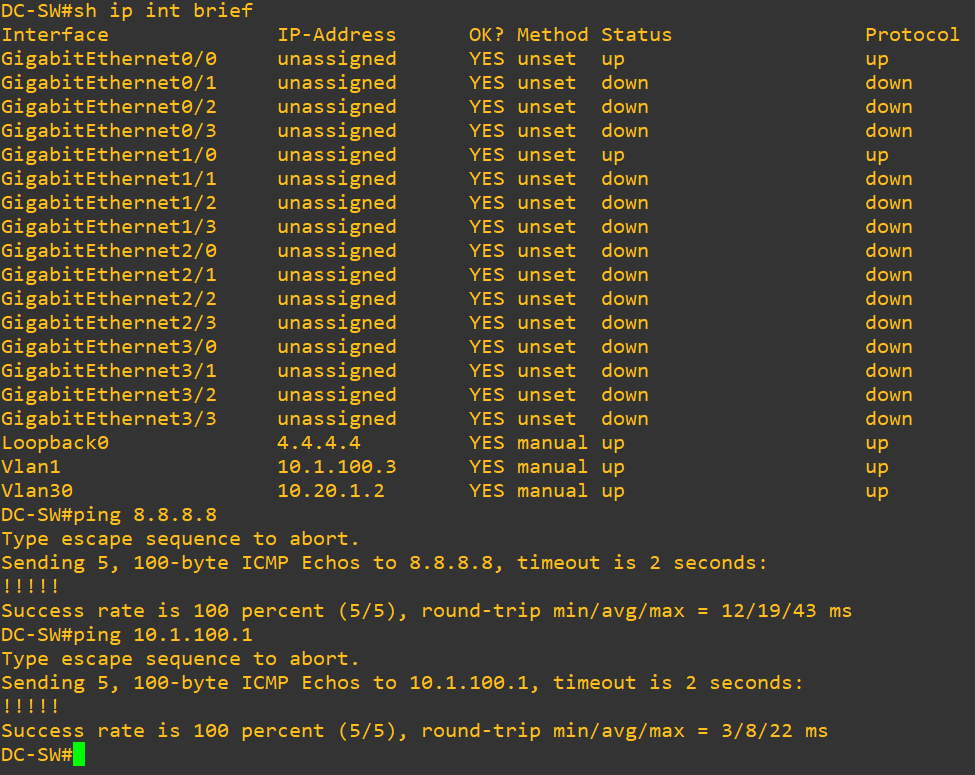
sh ip int brief
sh vlan brief
wr!
# Ping test
ping 8.8.8.8
ping 10.1.100.1
3. Debian SRV-DNS server
We will be adding a Debian server to our new VLAN on the DC-SW switch to improve our network performance and enhance security. I have added the Debian server appliance from the GNS3 Marketplace. You can download it from the link below.
https://www.gns3.com/marketplace/appliances/debian-2
# So on Debian server
# Login is : username: debian and password is : debian
# Set new hostname on debian server
hostnamectl set-hostname srv-dns# Replace any occurrence of the existing computer name with your new /etc/hosts
# Network configuration : In “/etc/network/interfaces” comment out “source-directory /run/network/interfaces.d” # – Remove “/etc/network/interfaces.d/50-cloud-init” – Create “/etc/network/interfaces.d/10-ens4”, for example: # # auto ens4 #iface ens4 inet dhcp iface ens4 inet static address 10.20.1.10/24 gateway 10.20.1.1
rm -rf /etc/network/interfaces.d/50-cloud-init
touch /etc/network/interfaces.d/10-ens4

nano /etc/network/interfaces.d/10-ens4

iface enp0s3 inet static
     address 10.20.1.10/24
     gateway 10.20.1.1

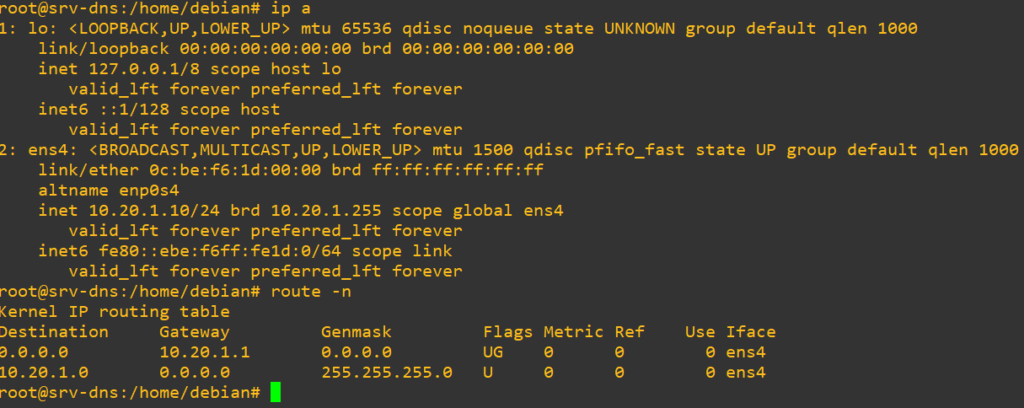
# Check network config
ip a
route –n
# Set up dns resolving
nano /etc/resolv.conf
nameserver 8.8.8.8
nameserver 8.8.4.4
# Test dns resolving
ping google.com
# Update system
apt-get update
apt-get upgrade –y
# Next we need configure permanent dns resolving
apt-get install resolvconf
systemctl status resolvconf.service
systemctl start resolvconf.service
systemctl enable resolvconf.service
systemctl status resolvconf.service

nano /etc/resolvconf/resolv.conf.d/head

resolvconf --enable-updates
resolvconf –u

systemctl restart resolvconf.service
# Unfortunately, I need to run this command on every restart, and I don’t know why. Maybe you can help me solve this. Feel free to leave comment.
systemctl restart systemd-resolved.serviceThat’s all for today. In the next article, we will install and configure a DNS server on this Debian appliance.